Pages

Showing posts with label projects. Show all posts

Tuesday, January 6, 2015

nursery essentials

there is a lot of time and energy that goes into pregnancy. i mean, there's the actual time and energy it takes to BE pregnant (a lot. of both. and gummy bears. a lot. of those.). and then there is the time to prepare. both phil and i are thorough - there is a lot of time and discussion prior to almost all of our purchases, even the more minor ones. which means we have spent many, many hours online researching what we "need" for a baby. i say "need" because, really, you need a car seat and a place to sleep. a way to feed the baby and cloth them. the end. but there are so many things that make life easier and / or prettier : )

so there were many hours devoted to looking through blog posts and asking other mamas what they really needed. since our house is not large and the baby's room is the smallest of all, the hope is to take a more minimal approach to baby gear and the nursery, in particular. these are some of the best lists i found while wandering online:

minimalist registry list from the fauxmartha
essentials from love taza
baby list from oh joy
the multi-post powerhouse guide from modern eve

from all of that, we narrowed it down to what we decided were the essentials for the way we live and want to live with our kiddo and her nursery. i've already shown my affection for simple, modern cribs. and that we will use a chair we already have in the house as an upstairs snuggle spot for reading and nighttime feeding. but there are a few other things we wanted in baby's room.
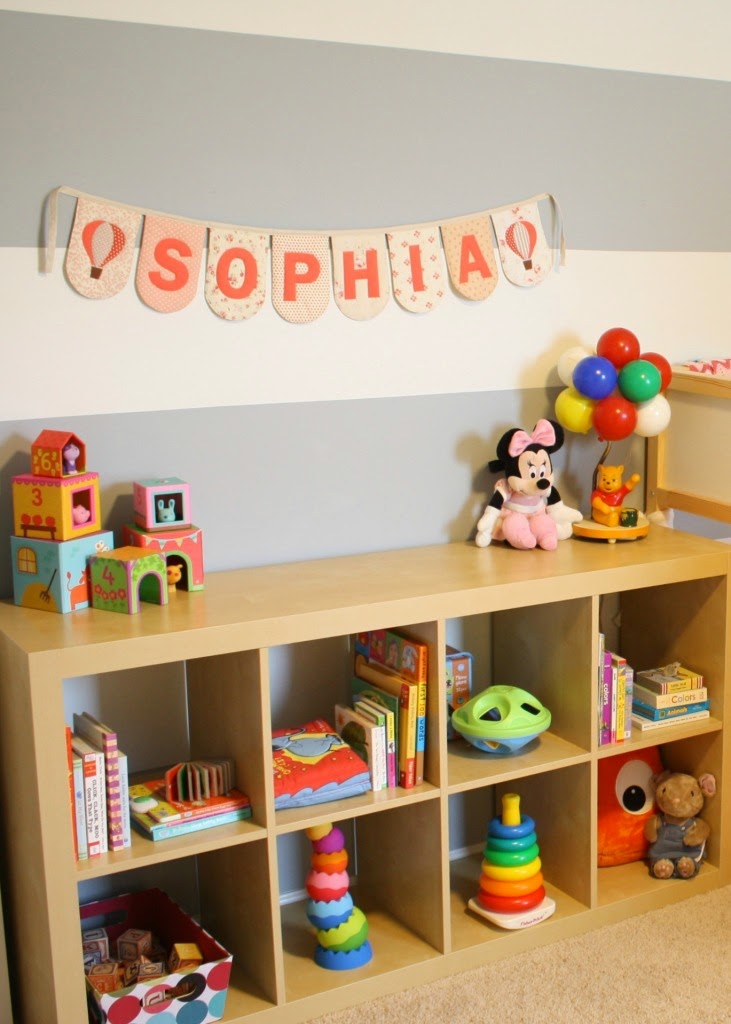
book shelves
i am a big reader, and actually a bit of a book hoarder. there are no less than four books on my nightstand at any typical time - a mix of fiction and non-fiction (biography, self-help, cookbooks, whatever). and my hope is to pass the love of reading on to our little bug. i'm sure by the time she's in school, everyone will be almost exclusively e-reader (tear), but until then, we need a place to store books. plus, babies use board books and cloth books and squeaky, fuzzy books with tails. because that is way more fun than swiping an ipad or kindle in your snuggly chair! so we started thinking about what we could use as book storage. there are so many great ideas out there and, no surprise, we lean toward the less cutesy-kiddie options and more toward simple, wood options.

cute, simple shelves from DIY Mama
preschool-style bookshelf
gorgeous apartment tour on cup of jo
ikea spice rack hack
changing table
pretty much everyone i talked to and every list i read recommended just using a dresser with a pad on top, because the changing table is not a multi-purpose piece of furniture. well, okay then. makes sense to me. especially since we need the dresser storage in our tiny little room for our tiny little person. so as i searched further, i found this interesting cleanable pad. as opposed to the traditional piece of foam / vinyl / whatever and washable cover. my thought is less laundry = less annoyance. and, hello, it comes in gray.

keekaroo peanut changing pad available at amazon or giggle
mobile
i already mentioned my love of calder and desire for a beautiful mobile for little nugget. i've also been reading about montessori, and how mobiles play an integral part in babies' development. i've been researching how to set up a montessori baby space, and this blog (how we montessori) has been an especially good resource. here are some mobile resources from the blog, and even some DIY ideas! we are not doing the child bed on the floor (yet - it may come as baby gets older - i am too anxious to put her on the floor in our old house now), but a lot of montessori resounds well with us. we aren't really musical elephant mobile people (no judgment), so these simple mobiles mesh with our style and baby's learning needs. win-win. i may make a few of the montessori mobiles for baby to reach for from her baby gym, but over the crib, i think we'll go with one of the beautiful modern mobiles out there.

a beautiful montessori gobbi mobile from etsy
one of the many stunning flensted mobiles available from allmodern
toy storage
again, montessori has ideas on toys and toy shelving. simple wooden shelves with only a few toys within reach of little people and baskets that sort items. but our nursery is very small - i'm not sure this is something we can fit in the room. our back room will become a play room, so perhaps we just put the shelves back there?

simple shelves and storage from this great blog post
bath storage
our house has a single bathroom for us to share. it's a family bath. i'm an architect, so i've drawn up SEVERAL plans for us to add a second bath upstairs. but we took a three week trip to africa this year and now we're having a baby, so big renovations are on hold for a bit. i've been looking for tips on sharing a family bath - most are for large families in farmhouses, roommates (been there done that, bath toys are different than 17 shampoo types), or extolling the benefits of teaching kids to share. all excellent advice, but we're going to feel it out. i'm thinking collapsible tub - like a colander : ) and keeping towels and wash cloths in the nursery. toys... again, not sure what to do.

i plan to update this once i figure out which end is up because right now it is just my blog-informed, naive conjecture... and i know it will take us some serious trial and error as we figure out how to raise our little baby in our little row house in our city : )

Sunday, December 28, 2014

chair update


remember those gorgeous mid-century chairs we found on craigslist for an absolute steal? well, the plan was to refinish them and make new cushions. then, the summer happened and the baby projects started and the plan changed to having someone ELSE refinish them and make new cushions. and maybe sell / trade them the little triangle table to help offset the cost. it's a cool table, but not anything  we need in the house. it's a strange shape and also needs a little work.


the chairs need some re-gluing, new straps / webbing (seat support), and some wood refinishing in addition to the cushions. i'd like them to be restored to their original(ish) color of wood and then add simple, navy cushions. some of my inspiration photos:

fabric is a little light, but photo of sold item from this shop
photo from expired listing at this cute shop
photo from here
however, we got a few bids on the restoration and upholstery work. and the cheapest was $500 a chair!! ummm, what?! so now it's back to the drawing board. do we sell the chairs and buy something else? at $500/chair, we can buy really nice chairs. like, really nice. do we just live with the ugly a little longer and take on the project after the baby comes? something in between? maybe just a large foam base cushion and interesting pillow for the back... 

idea & photo from here
any ideas? any good places to buy ready-made cushions?


Tuesday, December 23, 2014

cribs & gliders

so big news in the dickinson house... it's time to design a nursery! we are beyond excited to welcome a baby in early 2015 : )

what does this mean for the house? well, it means we need to do a little re-arranging upstairs. our "DC third bedroom" is currently my closet. and the back room, the house's old sleeping porch, is our junk room : ( the plan is to make the closet into the nursery and the back room into a study / playroom. the guest room will stay the guest room. and pink (sorry, dad). so grateful that we are not adding "moving" to the long list of baby prep!

as for style, we want something Scandinavian and gender neutral. we decided to find out sex (a girl!!), but don't want to re-buy major pieces or be painting rooms for kiddo numero dos - should we be so lucky as to survive this one and be blessed with another : ) think lots of white and wood and grey (duh). artwork will be where we do a little gender expression... the plan is to hang this gorgeous number over the crib. I have a few art pieces left from my pre-married days (aka my feminine, shabby chic phase) that may find their way in. and I've always loved the work of Sharon Montrose, particularly the little darlings series. I mean, c'mon, so cute. or we'll do some family photos or black and whites from our travels. did you know babies only see in black and white at first??! oh, and a mobile. cannot forget the mobile. I have loved calder's mobiles since studying abroad in college, so i'm hoping to find a modern (and less expensive) interpretation.

onto the major pieces... my dream crib is the oeuf sparrow. soooo pretty. and sooooo expensive!

 
so if we can't find one at a reasonable price on craigslist, we'll be doing the ikea sniglar. similarly simple, but 1/10th the price. great reviews, solid wood... a real winner for under $100, in my opinion.
 
 
I feel like either crib could go masculine or feminine, and could be passed down through a few babies. we'll do neutral crib linens. as for glider / rocker, we're going to use a plycraft lounge chair (which is an eames knock-off) we found on craigslist a while back.
 
not our actual chair, but similar. photo from here

it leans, rocks, and has armrests and an ottoman. plus, the headrest is tall enough I can lean back comfortably. we're going to try it and see, since we already have it. it was downstairs for awhile, then in our bedroom... the leather is in so-so shape, but should be easier to clean than most fabrics. and, I have to say, i'm not a huge fan of a lot of the glider options out there. my all-time favorite rocker is the eames RAR, but at $500+ and no headrest, it did not make the short list. I mean, if we found one on craigslist, i'd find a home for it no question : )
 
we're also going to convert an old dresser into the changing table. and by that, I mean we will paint the old dresser and slap a changing pad on top. maybe i'm naïve, but I never understood the dedicated changing table as a piece of furniture you buy. eh. open to comments from people who actually have babies (and, therefore, informed opinions, haha).
 
all of this change will spur many home projects, leading to (hopefully) more blog updates. we had stalled a bit on the house: burned out, working many, many hours and traveling. during this pregnancy I have gone to south padre island, texas; eastern shore, maryland; san antonio, texas; new york, new york; ft campbell, kentucky; nashville, tennessee; ft bragg, north carolina; ft hood, texas; dallas, texas; northern tanzania; kigali and northwestern rwanda; coastal tanzania; dubai; houston, texas; san diego, california... and I've had to say no to some work travel to the west coast. but the nesting instinct is real and strong (and felt by dads, too), so get ready!

Tuesday, May 6, 2014

planning my garden

we've been here two years. two crazy years! things are coming together in the house, so now i need to turn more of my energy outdoors. i've done a few things. i cleaned up a lot of the plants that were not my style. we also decided that we're going to add grass... i know, i know. it seems counter-intuitive. especially as big fans of xeriscape and edible landscaping. but we want to get more light into our basement and have a little spot of grass for future dogs and / or kiddos to play : )

my style is cottage garden. old lady cutting flowers, vegetables and herbs. a backdrop of boxwoods and hydrangeas behind dahlias and rosemary. i think it fits with our 1929 house. and it fits with our life. i cook a fair amount, and i LOVE to be able to cut fresh herbs from the garden. we also entertain and i also LOVE to have fresh flowers in the house when we have guests. so my plan is to move some things around and plant with seeds for most everything else. plants are expensive!!


this is an old image of the front of our house. you can see it is missing our front walk. but you can also see a rough idea of the plan : ) we have some great existing plants: azaleas in white, pink, red; peonies; lilac; dogwood; hydrangeas; roses; irises; tulips; and infinite day lilies. i'm so grateful that we aren't starting from scratch. we've moved the azaleas and peonies toward the front (marked cutting garden above) and i've been slowly relocating all of our day lilies to the front of the kitchen garden area. a mass of blooming flowers is just so lovely, no? we'll seed grass in the fall and take it from there!

Friday, April 25, 2014

shedding some light

we've made more changes in the den. the latest is changing out a sconce on the brick wall. the original sconce was a little too shabby chic. while i love that style (i have the book, duh), it's a little too feminine for phil.


so i looked high and low for something modern, simple, and relatively inexpensive. i found a lot of fixtures i really liked, but phil would nix for price : ) finally, i found this one forty three sconce. but it was sold out. forever. so i followed the studio on instagram to know when it was back in production. and i finally was able to order it!


it took a few, okay several, weeks to come in. but well worth it for a beautiful, handmade fixture at a reasonable price! i opted for white and brass. the room is gray, the door hardware is brass (and antique brass-ish), and the trim is white. it even came with bulbs! so we took off the old fixture...


and discovered it had cloth-covered wires!


uh-oh. glad we took it off. then we painted the junction box on the wall, so it would match the shiny new white fixture. and then we installed the sconce ourselves!


actually, it was much easier than i expected. we just watched a quick youtube video after a google search. super quick, super easy.


doesn't it look great!?! i love it. we debated whether to orient the fixture with the bulbs up or down, and decided on down. it seemed less "bathroom vanity" and more "back den."


the light is bright. phil thinks maybe a bit too bright, especially for movie nights. eh. i like it. but my couch seat is further away : ) i'm looking at dipped bulbs as an option to shield some of the more direct light. but i think i'll wait until these burn out.

the den is getting close to complete; the major things left are accent pillows and artwork. the pillows we currently use are from my first apartment in denver, and a little worse for the wear. since this is "phil's room" we're having a disagreement over the artwork... he wants movie posters. ummm no? haha. we'll see. i think we may have some compromises in mind...

Tuesday, April 22, 2014

a most tedious undertaking

we live in an old house. old houses come with "old house things" - doors that stick, stairs that creak, weird night-time noises, and hidden quirks from previous owners. and layers upon layers upon layers of paint. this house has 85 years of paint. on EVERYTHING. including the door hardware.


yuck. and the doors between our den and kitchen / dining room have old metal weather stripping, since our den used to be a porch. the metal has paint all over it, too. well, one day, phil got tired of looking at it and started to rip off the metal. and he took off the door.


gorgeous. ha! luckily, the gaps that the weather stripping had been covering weren't huge. all he had to do was use some wood filler and then paint. okay, LOTS of wood filler. and LOTS of paint. 


five zillion times better, right??!? so then we had nicely painted, significantly cleaner-looking door frame. then the bad part started.


we had been researching ways to clean old hardware (the usual suspects: design spongeapartment therapythis old house), but didn't have a crock pot. well, we actually had TWO crock pots, thanks to a great wedding shower at phil's parents' church. but one we took back when we moved to DC. and the other we actually gave to phil's friend when he was in law school up at NYU (they took it back on the bus!!). i just didn't use it. i like crispy food : ) any who... we looked on craigslist for a cheap crock pot, because no one wants to use the same crock pot you use for food (as my friend alison said, "killer queso!"); but, didn't get any immediate hits. so we did the boiling water / baking soda method. 


we pulled a couple of mop buckets from the garage and started boiling water in the electric kettle. sidebar: i had a roommate in college with a british mom who introduced me to the electric kettle concept. they are AMAZING! thanks, becky! i use it way more than i ever thought possible. okay, i'm back. so we used a bucket per hinge and filled it with boiling water and baking soda. then it soaked for at least 30 minutes, so the hardware was cool enough to handle. then phil scrubbed and scrubbed and scrubbed. the first layer of paint would peel, then he would use a toothbrush and brillo pad to get the next layer. and then we'd boil more water and start the process over again. each hinge took, oh, about five cycles of that. the scrubbing was brutal. 


one of the coolest things about the process was taking apart the door hardware. he even took apart the lock. since this used to be a back door, it has a locking mechanism - although we don't have a key. the soak and scrub got rid of more than just the paint: the rust came off, too. 


look how pretty! i can't even describe how clean the finished look is compared to the old. the patina is still there, you still know it's old hardware. i think it's brass-plated, judging by the color (and we did a magnet test), and i love it. the glass doorknob is cleaner, too. before we do the rest of the doors - there are TEN more (!!!!!) - we are continuing the crock pot search. i'll let you know if it speeds things up. man, i hope so!

ps - throughout most of this tedious process, this lucky lady was sitting at the dining room table working on a deadline for work. phil is amazing. he would let me know good times to jump up and take a photo. seriously, all you single ladies, the best traits in a husband (to me, at least!) are an outrageous sense of humor and an incredible work ethic. nothing better than knowing my good-looking guy is working hard all day and coming home to crack me up : ) 


Sunday, November 17, 2013

new numbers

i haven't been doing a lot of projects around the house. i've been doing a lot of movie-watching. and hanging out with friends. and traveling. hopefully inspiration for a substantial and productive project will strike soon : )

recently, phil and i changed out our address numbers. the existing ones were brass and installed above the top porch step, making it hard to see. we also had a little rot problem with the trim along the porch, so we were trying to not draw attention to that area.


i had my eye on the neutra house numbers from design within reach. i kept hoping they would go on sale, but they never do. oh well. we ordered them anyway : ) 


they arrived in neat little boxes, each individually packaged. we decided to use the pin-mount method, which lifts the numbers away from the house. it adds depth and i wouldn't do it any other way. we chose the black numbers, hoping the contrast would help with visibility. i love aluminum, but this time function won over form. 


the numbers came with mounting templates. we tried them in several locations and with different spacing between the numbers.  we decided to install them on the porch post, running vertically, opposite our flag. the templates made installation so much easier - we just taped them up and drilled pilot holes. 


the standoffs included for pin-mounting were friction fit into the holes. we put a little caulk around the pins to make sure they were nice and snug.


et voila! now our front door is now wonderfully framed by our flag and our new house numbers!!

Sunday, August 4, 2013

the baseboards (or how i almost lost my mind)

oh hey. i'm back. took a little hiatus to enjoy my summer and not study for my exams : ) we've also tackled a few projects, which i hope to post about in a somewhat timely manner.

we spent our fourth of july on our hands and knees. sanding. and sanding. and sanding. and sanding. remember how we refinished the walls and floors before we moved in? well it did a number on our baseboards. first, the painters came and stripped all the walls down to the plaster, using humidifiers to help them strip the wallpaper. then, a few days later, the flooring contractor came in and pulled off the shoe molding to strip and refinish the floors. i guess the base was still a little soft, because it chewed it up. and we didn't have time to have the painters come back and touch it up after the flooring contractor, due to our crazy fast timeline.


ummm it looked awful. and we kept putting off fixing it, because we knew how horrible the project would be. we finally had extra time over the long holiday weekend at fourth of july and decided better sooner than later...

we moved all the furniture away from the walls. this meant moving a large part of the dining room into the den.

so that was fun. my arms were already sore from moving furniture! but then the real fun started. the sanding. we started with a medium grit sandpaper (about an 80 grit). the hardest part was not sanding the shoe molding while still getting all of the base smooth. there were several layers of thick, goopy paint and it took some serious time to get it ready for paint. after sanding all of the boards (entry, living room, dining room, stairs and upstairs landing) with medium grit, we gave it a pass with a finer grit. again, it took forever. 

my sanding fuel! can't get enough of this stuff

the straight runs were not so bad to sand. the stairs, however... well, let's just say we both deserve a hot stone massage after that situation. 


pretty, right? : ) to protect the edge of the stairs, we wrapped sandpaper around sponges (like we did while working on the dresser). that way, the sponge rubs against the finished wood while the sandpaper worked on the grubby trim. 

so we finished the sanding. and ate our weight in chinese food (ps - this is our favorite delivery place in NW DC). then we cleaned. we used all-purpose cleaner and old cotton t-shirts to clean all the sandpaper and grime off the entire area. it's one of those chores that i hate doing, so i don't do it very often. which means this is the first time the baseboards received a good scrub in about a year. oops. so if nothing else, our baseboards are nice and clean after this little adventure : ) 

the next morning, we taped. again, the straight runs were not difficult, but the stairs were time-consuming. this task was definitely worth it, though, so take your time and be accurate. phil even likes to run an old credit card along the top edge, to ensure a really good seal between the tape and the wood. 


after the extensive taping, we finally started painting. we used a white trim paint we found in the basement and a thin, high-quality brush. 


the painting went quicker than the sanding, but it was still slow work. it's careful work. and we would be painting and see a spot that needed more sanding (like above). so we'd have to not paint that area, then wait for the entire zone to dry (to prevent dust from getting into the wet paint), sand it again, clean it again, and then paint it. i'm not sure if anyone could ever tell that we went to all that trouble as we went once all the furniture is in, but phil is a stickler for doing things the right way. me... well... not so much. i'm happier to just move quickly. but i'm always happy when phil makes me stop and do things correctly. in the end. even if i fight him while we're working. not that i would ever do that : ) 

whistling while we work aka singing along to one of our many pandora stations
we waited for the paint to mostly dry, then took off the tape. we had to do a little touch-up work here and there, both with the paintbrush and also the razorblade (to get a few messy edges off the shoe mold). 


so after two and a half days' labor, we were done! it's not perfect, but it looks so. much. better! 


we moved the furniture back in and opened a couple of well-deserved beers : ) 

Sunday, June 16, 2013

building a front walk

we are on a fairly busy street. a couple of bus routes, car traffic, and a major pedestrian route. we also park on the street in front of our house. but we also have what's called a "tree box" - a five foot strip of dirt between street and sidewalk. last year, we put in a quick path with some leftover slate tiles i found in the backyard. it looked great for a few months, but then the tiles started splitting and it didn't  hold up. we left them over the winter, deciding what to do.

 in a perfect world, we want to resurface our front sidewalk and stairs with flagstone. it's so gorgeous, but a little out of our current price range. so we decided to dig up the bricks that were our yard border to use as a walkway. maybe someday we'll upgrade, but for now, all we had to buy was gravel and sand.

we watched several youtube videos on building a brick walkway. we started by digging down about four-ish inches to allow for gravel, sand, and bricks.


then we marked off the centerline with chalk. we decided to center the walk on our front steps. 


we dug and dug and dug and dug. the soil turned a little clay as we got deeper and it was harder to dig. i decided to take the soil we dug up and bring it around back to start my little raised garden bed i'm trying to build. since we live in a townhouse, there's always a tough decision: do you take the time to walk around the other houses (we're middle in a row of seven) to the alley, or do you walk through the house? i'm lazy, so i took buckets of dirt through the house. and then vacuumed. and swept. may not do that next time. sure would have been easier with a wheelbarrow. eh. 


after all that digging, we decided to call it a day. i had been sick with a summer cold and phil's back had reached its limit, so we knocked off for the day. it ended up raining the next week. a lot. like several inches, flash flooding a lot. which meant our tree box became a disgusting mud puddle. much to the dismay of our neighbors and delight of local dogs and toddlers. so we had to wait a week for everything to dry out and then re-dig a little. 


after we re-dug, re-measured, and re-chalk marked, we poured a layer of gravel. we just bought the cheap multi-use stone from home depot and poured two bags into our pit. then we raked it out, so it was nice and even. 


then we poured a 60 pound bag of sand. we actually chose sakrete, so it would hopefully bind everything together. we poured a bag, spread it out, tested the depth with a brick... and were too low. oops. should have used more gravel. 


so we sprinkled another bag of gravel onto the sand. and then added more sand. checked the bricks and we were just right. 


we compacted the layers down. mainly by stomping and jumping on it - we're nothing if not professional : ) we also ran a scrap piece of lumber along the length of it to make sure it was (relatively) even. 


then we started placing our bricks. there was some discussion about which pattern to use. we couldn't cut any of the bricks, so traditional running bond was out. we tried a simple stack bond first, but had a hard time getting our lines 100% straight. so we decided on a basketweave, so no cutting bricks as well as some visual interest. and the bricks started to interlock a little, which we hope makes the path last longer. 


we laid them very close together and then stepped on them to make sure they were tight. we adjusted as we went - kicking them to the side a bit to keep it perpendicular, using our heels to kick them snug. the sand really gave a level field for the bricks, they went down easily. we did find that it was better to lay them directly down as close as possible to the adjacent brick. if you set and slid, the sand got in the way and the basketweave wasn't as tight. 


amazingly, it was a really good fit - even rows with little extra space. we filled the ends with gravel where there were small gaps. phil was really worried about the path "spreading" out over time, so we added some edging. we used a plastic edging that could be cut with our clippers. 


we ran it tightly along the edges, and hammered in the stakes that came in the package. it did make the path seem more stable. 


finally in the home stretch! we poured another half a bag of the sand over the top and swept it in. i swept back and forth and back and forth, to make sure it got in every little joint. 


we sprayed it down with the house and swept some more. we repeated the spray, sweep ritual several times. the sand started to get harder to sweep, but it filled the joints very well. we used the jet on the hose nozzle to get the rest of it. 

please ignore my super-pale legs!
then we put soil all the way to the edge. it would be great if the edging wasn't visible, but i'm not sure it will stay hidden. hopefully, the plants grow up over the edge and cover it.


we're pretty happy with the final product. i'm so glad phil forced me to do it correctly! i was ready to just lay bricks without all the base steps. but you can definitely tell the difference in quality and evenness with the proper preparation. 


i also planted some more monkey grass / liriope in the tree box. we have some variegated already and when we lost the big tree last year after hurricane sandy, the weeds moved in. must be all that extra sunlight. it has become a big annoyance - go a couple weeks between major weeding-pulling and you're in for an ugly few hours. so we decided to fill in a few gaps with more of the same type of grass, in the hopes that it will fill in and choke out the weeds. 


pretty successful project! hoping that it lasts longer than the last path. and good to know we can work together on a multi-step project without screaming at each other... i will say phil is more patient than i am. and while we couldn't spend father's day with our dads, we honored them the best way we can - by working hard, just like they taught us : )