Pages

Sunday, January 13, 2013

hmmmm

i think i've found a weight gain culprit... my work travel eating habits :( oops. this week was the LAST time for candy at the airport, cokes on the plane, and calorie-bomb dinners at yummy restaurants. i promise.

...unless we get another project near new orleans. then all bets are off!

Wednesday, January 9, 2013

christmas pasta


my sweet sisters-in-law gave me the kitchenaid pasta roller attachment for christmas! phil's aunt gave us the mixer as a wedding present and it has been the greatest. i use it all the time, but the greatest gift is that every time i use it, i think of aunt pam : ) so i'm looking forward to thinking of catherine and leslie whenever i make my own pasta. the gift was from their entire families, but if they're anything like my little family, the wives are the ones in charge of gift-buying : )

after spending time with phil's family, we drove out to west texas to stay with my sister. she and her husband just had a precious baby boy, so it was easier for us to come to them to celebrate christmas this year. and sarah got a mixer as a christmas present! we decided to play with the pasta roller one afternoon as tiny baby everett napped. and i decided to do a post about it, in the spirit of one of my favorite blogs, citrus & spice!

i've never made fresh pasta, so i did a little searching for a recipe and found this helpful thread on chowhound. we used the "poor man's pasta" recipe suggested in one of the posts:

2 cups flour
2 eggs
3 tablespoons water
4 tablespoons olive oil
2 pinches of sea salt (i added this - i love salt!)

then we mixed it in the kitchenaid with the flat beater just until the motor started to struggle - it's a strong dough! then i turned it out onto a floured cutting board and kneaded for about 4-5 minutes. the dough turned smooth and elastic. then i let it rest about 30 minutes in the bowl (most recipes suggested this period to let the gluten "relax").


next, i divided it into small pieces and turned on the mixer with the roller attachment. i set the roller to its widest attachment (the 1 setting) and rolled the piece through. i folded it in half and rolled it through again - i did this about three or four times before turning it to the 2 setting. i passed the dough through on 2 a couple of times and then on 3. i left the dough fairly thick (the roller goes to 8!) because i was nervous about the filling coming out of the really thin dough.


i set each rolled out piece on wax paper to wait for the filling. i *should* have floured the wax paper. lesson learned.

i mixed up some filling based on this recipe. i altered it for our tastes and the amount of dough i had made:

1 egg
1 1/2 cups part-skim ricotta cheese
2 teaspoons dried basil
2 teaspoons italian seasoning
salt and pepper

i would have used fresh herbs, but my sister's garden is in winter mode. next time, i will add much more seasoning. first, i brushed an eggwash (just quickly whisk one egg) over the dough strips, to help create a seal when i made the little purses. i spooned globs of filling onto the sheet at regular intervals and then laid another eggwashed sheet on top. i cut in between each filling pocket and sealed each ravioli. kind of ugly, and too large.


i changed my strategy. since i didn't have a ravioli cutter (or the patience to do it perfectly), i had irregularly shaped dough sheets. they weren't matching up and i had a lot of weird edges. so i put a glob  of filling on one side of the pasta sheet, cut it into wide strips, and folded over to create my ravioli. i like these better! we had some leftover chopped mushroom from making quiche the day before, so i sprinkled some of that into a few of the ravioli.

i took each completed ravioli and pinched the edges together. it took awhile to find my groove in the correct filling amount - i tended to overfill and then make a mess when pinching edges. i separated the ravioli and dusted them with flour. i let them air-dry for about 45 minutes, then put them into containers for the fridge.


at dinner time, i boiled a pot of water with olive oil and salt. the ravioli stuck together in the containers, so next time i may try individually freezing on a cookie sheet (kind of like i did here) and then transferring into the container. hopefully, that would solve the sticking issue. anyway, i boiled them in an uncrowded pot until they started to float (about 4 minutes, max, since they were used the same day - i assume longer if straight from the freezer). i used a slotted spoon to put them in AND take them out of the water. they didn't all burst!! i was shocked. they seemed so fragile.

we didn't have any home-made sauce, so after the ravioli were done cooking (it took several batches), i poured out most of the pasta water. i kept a bit in the pot and added store-bought marinara, olive oil, and seasoning. i heated it through and then poured it over the ravioli and sprinkled freshly grated parmesan. seriously, i do NOT understand people using the already grated parmesan. i know i'm a snob, but yuck. it's like using minced garlic in a jar. the taste is different to me. is it really that hard to use a little zester over your finished plate? a block of parm will keep in your fridge FOREVER.

anyway, successful experiment!


i found a lot of good resources in my googling. did you know that ravioli is a typical christmas food for italian and italian-american families? i did not - i'm so timely : ) this post is incredibly detailed and helpful for the pasta rolling process. i looked through these photos on making the ravioli. i'm excited to keep trying and experimenting; i want to stock up my freezer with all kinds of ravioli! next try: whole wheat pasta and veggie filling.

Thursday, January 3, 2013

the dresser that's never finished

we needed a dresser for our bedroom. phil had been using an old one... one of those 1960s french provincial (a taller version of this) that is part of the bedroom suite my mom had growing up. it had been painted several times and was peeling and girly. we found a beautiful slate blue dresser at restoration hardware, but they wanted over $1000. on. SALE. no way!!

to craigslist we went. we found a long dresser with mirror for $25. good shape, lots of drawers, and someone to help us load it in the car. sidebar: one of my favorite things about craigslist is getting to explore random parts of the city. like this dresser took us to a crazy huge apartment building by the cathedral. HUGE. and it was built into a crazy hill. fancy lobby, but probably less expensive rent because not convenient to anything. i had never even seen any of this area before. i love that. i would have never been to this part of the city if not for craigslist. other sidebar: i don't do pickups by myself. ever. i watch lifetime. not gonna happen.

anyway... it was an awful honey-colored stain. luckily, it is solid wood - one of those lovely 1990s pieces from a north carolina major furniture company. we decided to use an extra gallon of paint and refinish the piece. phil had bought grey paint for our bedroom in our rosslyn apartment, but nothing highlights disgusting carpet like grey walls ; )

we did a lot of research on the best way to refinish. we bought a sander. the best tutorials we found were young house love (of course! love that site) and centsational girl (she has so many good tips on painting and refinishing). we bought all of our supplies:

primer, good brushes (phil splurged and it was DEFINITELY worth it), sandpaper in several grits, paint, wood filler, floetrol, poly

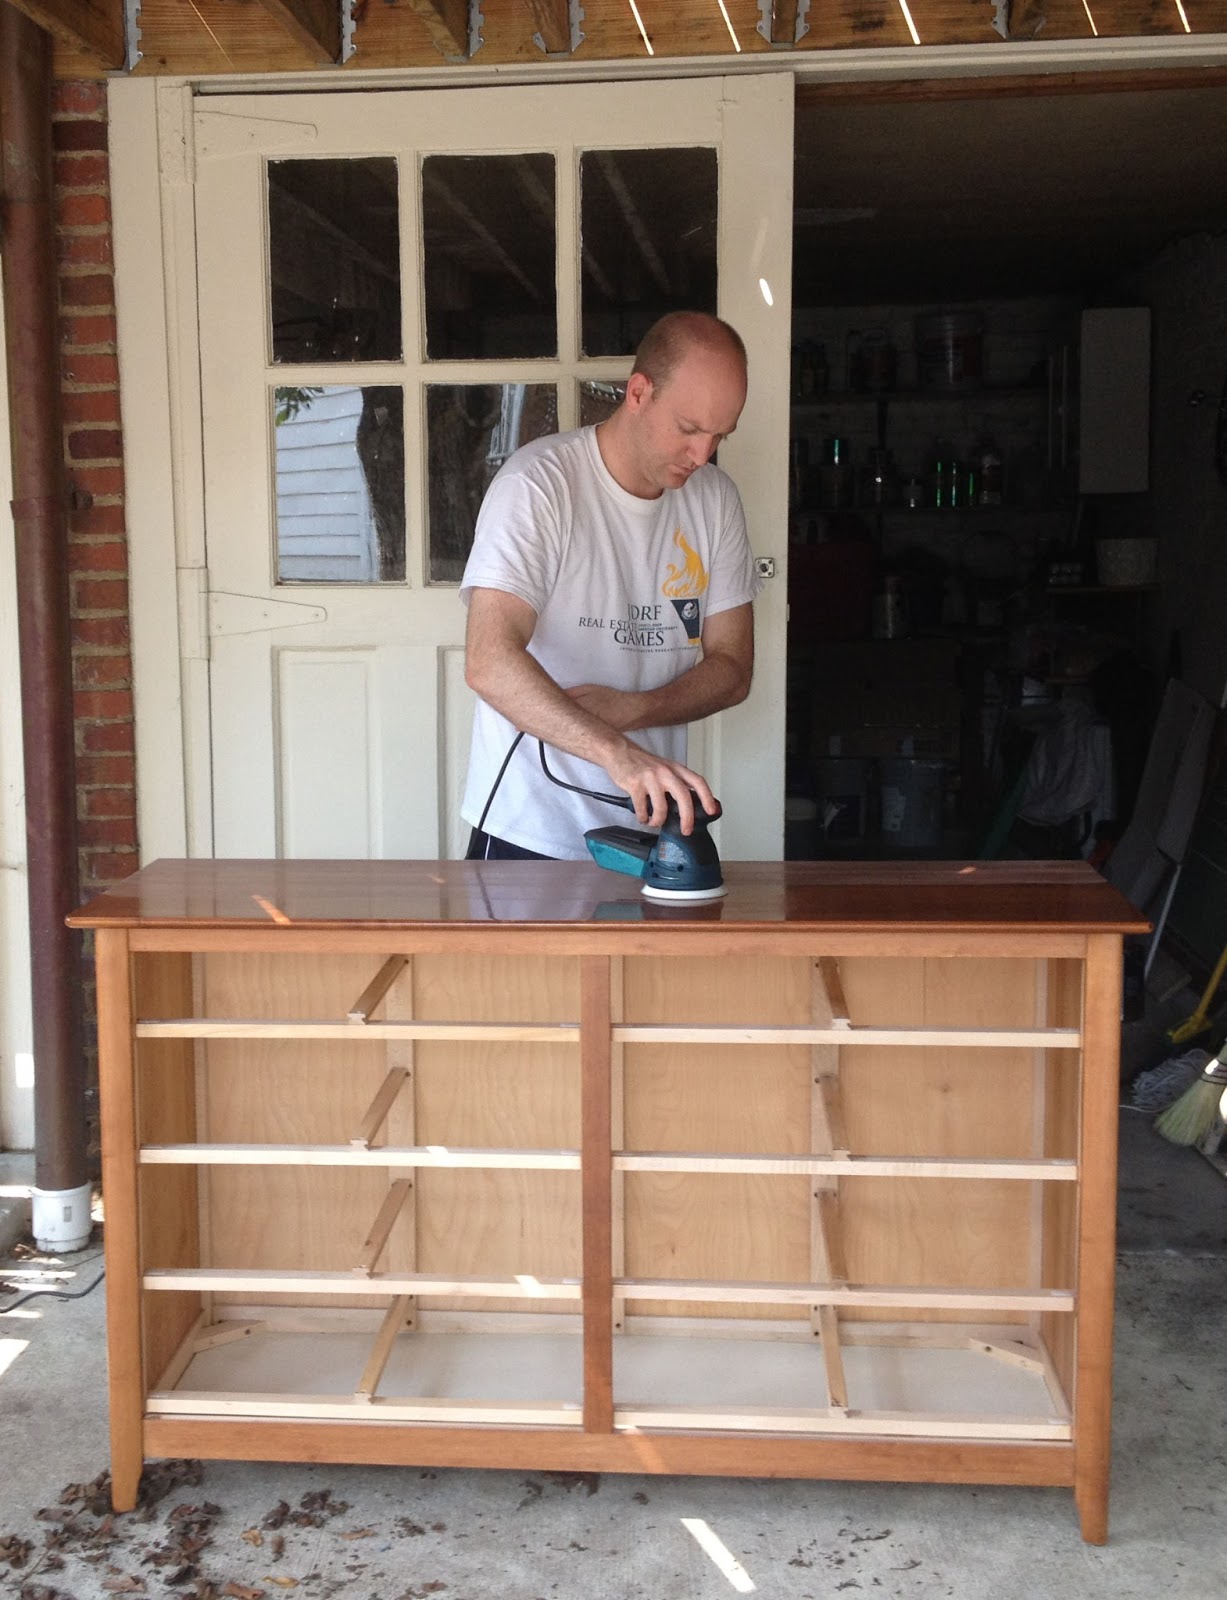
and we set up in the garage. we are always limited on time, so this project took us forever. like over a month. maybe 40 hours total (between two people), but spread out over several weekends to allow for drying and erratic schedules. needless to say, refinishing furniture is a big time investment. especially since we were not going for the shabby chic look. that looks is much quicker - less sanding, no priming, no even coats, no final poly coats. we decided we're growing out of the shabby chic look. i loved it in college, but too feminine for our first real house together (so i'm told).


first, we had to fill in a crack along the top of the dresser. we shoved it full of wood filler and let it dry. then we sanded. and sanded. and sanded. we used the random orbital on the large expanses and hand-sanded corners and edges. i used a sponge wrapped in sand paper. we started with a coarse grit and worked our way to finer. not super fine (yet), just prepping. we wiped everything down to get rid of the sandpaper.


we primed the entire dresser with two coats. we used long, even brushstrokes and tried to do a thin single coat on the entire piece. in between each coat, we sanded after the primer was dry. lots of sanding. hey, it's a good arm workout, right?


finally, it was time to paint! after a good sanding and wiping (no sawdust), we started to very carefully paint the dresser. phil was the best at long, smooth strokes for the top of the dresser - at over five feet long, that's a long stroke! it took awhile to get into the groove of getting a smooth finish. i recommend starting on bottom drawers, or practice on the back of the piece. you'll get the hang of it. another tip to help in the smooth finish is adding floetrol. we mixed it into red solo cups with the paint, following the directions on the back of the bottle (we found it at our local ace - love that place!). we did three thin coats. thin coats are better in the fight against drips and globs. it's okay if you get a couple of ridges, though. guess what? you'll sand them out! like i said, a lot of sanding. we used the finest grit sandpaper here (like 120 or more). and we were very careful on the edges - we're not going for shabby chic, remember?


the color turned out to be not as grey as anticipated, more slate blue. totally happy with it (and soooo glad it didn't end up on walls). painting all of the actual color took a long time. it was slow painting, since we were being so careful. then we'd have to wait for it to dry before sanding and painting another coat. what usually happened is we would paint and then have to wait until the next day or weekend to do the next coat. to keep the paint fresh in between our work and not waste any pre-mixed paint with floetrol, i would cover the solo cup with saran wrap. i would put the wrap so it touched the top of the paint and then put a rubber band around the cup. it kept quite nicely and didn't form a skin. we'd just mix it a little when we were ready to start again.

after all the coats (it may take you less or more, i think it depends on how you've prepped it), we did one final sanding with very fine grit sandpaper. then we did two very thin poly coats. this one is hard in a low-lit area (like a garage and under a porch). it had to "cure" for about a week before we moved it upstairs.


definitely not done - i just put the old knobs back on so we could start using it. i have a few ideas for knobs; i want masculine knobs. i loved these at anthropologie: 


but i waited too long and missed them on sale : ( back to the drawing board... i will post photos once it's actually complete! 

Tuesday, January 1, 2013

promises for 2013

i'm in a funk and it's time for me to take some action! i love new years' resolutions, self-help books, and diets. i do not love finishing projects. let's hope santa left me some perseverance in my stocking, because this year i have goals that NEED to happen.

1. our house is a wreck. phil is amazingly patient with my messy self : ) as a jump-start, i signed up for the january cure through apartment therapy. best i can tell, it is an email challenge with daily tasks to get me moving. i have too many things and next to zero organization. i'm open to anything! and i want a clean slate for finished rooms in this house. i'm not just talking about the kitchen and bedrooms. i mean the crazy office and even the garage. i've got 12 months, right??

2. i have been a total slump in the wellness department. eating relatively poorly and really letting the exercise fall off. i used to run. i've completed two (!) cherry blossom ten-milers; don't get too excited, it took me two hours. the trails near the house are gorgeous, wooded trails in a safe park. but i'm still not comfortable running them alone. so when phil twisted his knee, i used it as an excuse to stop running, too. not okay. my sweet friend kristen suggested a workout class instead of happy hour one night and we went to the bar method. yikes!! so difficult (i'm a total weenie), but i love it. i would like to go at least once a week and then pick up the running and/or yoga on the other days. exact goals to be determined. my experience is the more i exercise, the better i eat. and the weight gain is back. with trips to south america and key west planned for this year, i'd like to lose it. but more than that, i just want to feel good again!

3. i need to finish my registration exams. there are seven. i've passed two. i'm waiting to hear back on two others; one i feel very VERY poorly about, the other i have no idea. that is so frustrating - not knowing. and i am really hating the studying. signed up for another in mid-january... we'll see! this is the only goal i feel confident i can finish this year.

4. i haven't painted in what feels like a million years. once upon a time (high school), i took private watercolor lessons. i learned color theory and painting from a wonderful woman with the most amazing independent spirit. sitting at her kitchen table as she taught me to never use black or brown paint (mix your own!) was a retreat from AP classes, multiple choirs, and my family and friends. i also took lessons with a small group when i studied abroad in italy. my teacher was a local artist - gabriele - and he had us over to his house once a week to paint a piece or two within a couple of hours. we had a smallish paper, about 4x6, and travel sets of paints. then he would encourage our experimentation in broken english to capture the local landscape. i haven't really painted since. it's time. i'll start in watercolor (and sketching with chalk and charcoal, my other loves), but want to experiment with acrylics. maybe oil. hmmmm. maybe not.

5. complete a major sewing project. i would love to make a quilt. will settle for some pillows. *major* might be a bit strong...

6. find new ways to keep in touch with my family and friends. i'm not the greatest at keeping up relationships. in all honesty, i'm a bit of a flake. that's embarrassing to admit. i forget to call long-distance friends and i don't initiate plans with nearby friends. i like emails and texts. but i have four precious nieces and nephews. three born just in 2012. they can't email or text! i need to find ways to let them and others know they are loved and missed. and to initiate and keep plans with local friends. don't over-commit in the first place so i stop canceling. choose grabbing coffee over sleeping in on saturdays and skyping instead of mindless internet surfing after work. i'm going to be frank; this one is going to be the hardest for me. i have to decide to make it a priority because i decided to move far away from so many loved ones. well, now is the time!

7. post regularly on the blog! i have really let this slip. i started this not only as a project to document our first house, but also for my family and friends. when i write posts, my target audience is my granny zelda (hi, granny z!). she lives in north texas and we don't see each other very often. i don't know if she'll ever get to come visit us in dc. and if she did, the steep stairs and single bathroom would make for an uncomfortable (if not impossible) visit. but the blog is a way for me to show her what we're up to and share photos and projects. i promised her a gift every month of 2012 - this blog is an ongoing gift for you, granny z! but i need to keep it up : )

i'm sure i'll have more ideas. and more things i need to work on. my hope is that posting this publicly will help keep me accountable. hopefully i will achieve number 7 while posting about working on numbers 1 through 6.

cheers, 2013! 

Friday, December 28, 2012

there's a mouse in the basement!

well, the dc curse is upon our house. we have mice. georgetown is notorious for rats, and apparently glover park has mice.

we have a roommate in our basement, with a separate kitchen and laundry. we got an email several weeks ago that she had heard some "squeaking." no droppings, no chewed through food, no sighting. traps were set, but nothing. then she saw droppings and heard something behind the refrigerator. yikes!


we called the exterminator. per usual with house services, i searched on angie's list for a company that is highly rated and has coupons. i also prefer to go with a local company - you can usually bargain and build relationships with the staff (less turnover than a large chain like orkin). what a nice man! he explained the habits of the mice, which (naturally) i found fascinating and helpful. apparently, they can fit through a hole the size of a dime. *shudder* they run around when people aren't out and about - so night or while we're at work - and they run a similar route repeatedly. so he looked for droppings and "mapped" the route. there was a distinct circular route from the bathroom through a hole in the wall around the perimeter of the room (the basement is set up like a little studio apartment). he set up mostly snap traps (warning: people posted dead mouse photos in the user photos section of the amazon listing - ewww) all along the route. snap traps are more humane because they instantly kill the mouse, rather than letting them squirm and suffer in a glue trap. then he tried to plug any holes he found that were suspect.

he explained some important concepts for preventing and dealing with mice:
- they can't see very well, but their sense of smell is strong. use gloves when placing or moving traps so they can't smell your "human" smell. they will avoid the trap area if they smell you.
- don't change everything around along their normal track. for instance, if people see droppings in the cabinet under their sink, their first instinct is to clean everything out of the cabinet and leave a trap. the mouse will notice the drastic difference in the space and avoid the area (and your trap). try to place a trap in their route without disturbing it.
- use steel wool to block small holes. mice can eat through drywall, but not steel wool. he stuffed into gaps around pipes all over the basement bathroom.
- keep things clean and food in tightly sealed containers (like glass). luckily, he said our space was not to blame. it's normal for mice to seek warmth in the winter and having a vacant house next door is not helping; the direction they are all coming is the wall we share with the vacant house. problems will persist until that house also takes care of any issues (emails to the owner go unanswered).

unfortunately, we've found three dead mice in two weeks. i don't know if this is a lot or a little. the exterminator said we are not an "infestation" situation. we just don't want them to have babies! maybe it's just the joys of living in an old house with a basement in a city. and near a large field. my aunt works at a school built in a field in colorado and they have lots of field mice. she said the teachers use bounce fabric softener sheets in their drawers and cabinets because the mice hate it. so when i get home from holiday travel, you better believe i'm running to safeway to give it a try!

so thankful for a helpful exterminator that took the time to explain what he was doing and why so we can tackle this on our own. also thankful that he said the mice don't appear to be in the garage or on other floors. and the concrete, tile, and brick meet up without holes where the floors meet the walls so mice can't get in that way! it's the little victories... : )

update: phil came home from christmas vacation to find a dead mouse in our den. ugh. very upset right now.

Tuesday, December 25, 2012

a (wo)man with a plan

remember how i didn't decorate for christmas for this year? well, i've spent the month planning for next year! my plan is to order everything on clearance this year in the after-christmas sales to be ready for december 2013. we're on a bus route - which is wayyy better than an ambulance route! learned that the hard way - so i see our house from the bus everyday. it makes me sad to not have decorations. it also makes me want to make sure it looks as good in the daylight as in the dark.

there weren't as many houses in our neighborhood decorated and lit as i thought there would be. but this one is my favorite. i don't know these people, but thank you for the holiday cheer!


so i'm on the hunt for white lights. obviously, i'm jealous of their awesome storm door / good-looking front door combination. (and their huge corner lot!) but perhaps we'll have a different door by the end of next year : ) anyway, i just love the evergreens, wreath, and garland. and white lights are always my favorite - sparkly but restrained. 

here's the front of our house: 


the plan for next year is wreaths on the windows and door, with icicle lights along the porch and a garland on the railing. so pretty : ) i'm not sure about the red bows with our red brick, but this is the look i'm going after:

source
i'm really hoping for boxwood wreaths. there's just something about the structure that i prefer. 

these are on sale at lowe's!
i'm not sure about the whole bow issue. not much of a bow person. maybe i'll just use ribbon to tie to a nail above each window. like here. wouldn't that be pretty?? 

as for the interior decorations, i'm not sure which direction to go yet. i'm really drawn to the colorful vintage ornaments, but i'll always love monochromatic schemes. i like a crazy tree, not super-curated, but full of ornaments from special occasions and special people. phil's mom and aunt give us ornaments every year and i'm excited to finally be able to put them up next year. i have ornaments from before we were married : ) i've also gotten ornaments from various travels: italy, amsterdam, belgium, bahrain, various US cities... so that will be eclectic. but what about our mantel? or the banister? or the dining room table? ummmmm... at least i have another year! and, of course, endless inspiration from pinterest. off to shop the online holiday sales!


Friday, December 7, 2012

cyber monday

i love to shop. LOVE. sometimes i enjoy the hunt more than the actual kill... i can look for hours. and hours. and hours. and my plan of attack for each room is to build a scheme around the rug. typically, you start with fabric, or an existing piece of furniture/art/etc (ps - watch sarah 101 to see how she builds her schemes - it's so interesting!). however, given our relatively large spaces and limited budget, i am starting with rugs. i'm also pretty slow at putting together patterns. i enjoy it, but it doesn't come naturally. at work, i don't typically deal in color - much less pattern. i deal in space : ) also, working at a big firm on commercial design projects REALLY skews your sense of appropriate budget! commercial furniture and fabric is very different world from residential. well, the residential world that i live in!

we have been scouring craigslist, onekingslane, gilt, rue la la, 1st dibs, crate & barrel, pottery barn (because i get a designer discount!), ebay... and have only bought two. the first was in the basement of an estate sale in cathedral heights. it is a bit ratty, but found a home in the dressing room/closet. the second is a persian-style rug phil found on craigslist. he bought it while i was out of town. the size is amazingly perfect, but it has a bit of pink. hehe. okay, more than a bit. i still like it! and i'm always impressed with phil's amazing hunting skills. seriously.

so anyway... cyber monday sales. amazing. gilt ran some crazy clearance on nuloom rugs and i found one!! it is 9x12 and reasonably priced, even with shipping. it came in 10 days. in a GIANT bag.


phil brought it inside, but had to go out for work. so i came home to a giant tootsie roll in the living room! hooray! i somehow got it upstairs by myself - thank goodness for the plastic bag : ) 


i vacuumed the bedroom and moved a bunch of furniture. 


love love love this pattern!!! the hardest part was lifting the bed alone. i probably should have waited for phil, but i wanted to surprise him with something finished : ) especially since i'm prone to leaving things partially complete for entirely inappropriate amounts of time. like the half-folded laundry in the guest room...


in the room! night-time iphone photos don't look that great... but i'm very happy. loving the scale of the pattern. and it will look amazing with grey walls, striped curtains and a dreamy painting. i have one panel of the restoration hardware curtains already - phil used to work for an industrial building owner that happened to own a building with a restoration hardware warehouse : ) awesome sales!! i should have bought every curtain i saw - silk drapes are expensive. hoping that some of the after-christmas sales are good so we can keep moving forward!